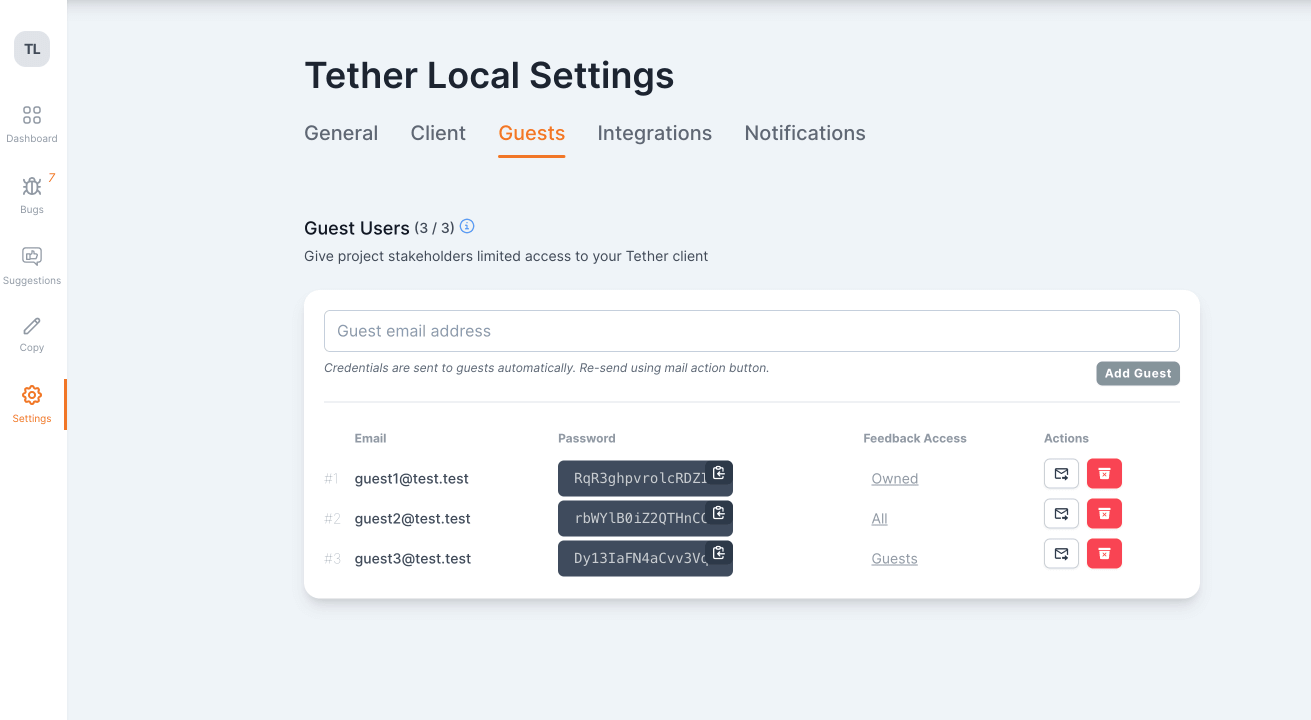
Guests
Guest accounts are associated with specific projects, and allow limited access to the Tether widget for non-team members (e.g. clients, investors, stakeholders, etc.). By default, new guests may only interact with feedback they personally submitted. However, you can allow guests to see feedback submitted by other guests, or those submitted by the entire team by modifying the Feedback Access level for that guest.
{warning.fa-lock} Guest credentials are only valid for the Tether widget associated with the Project the guest was added to.
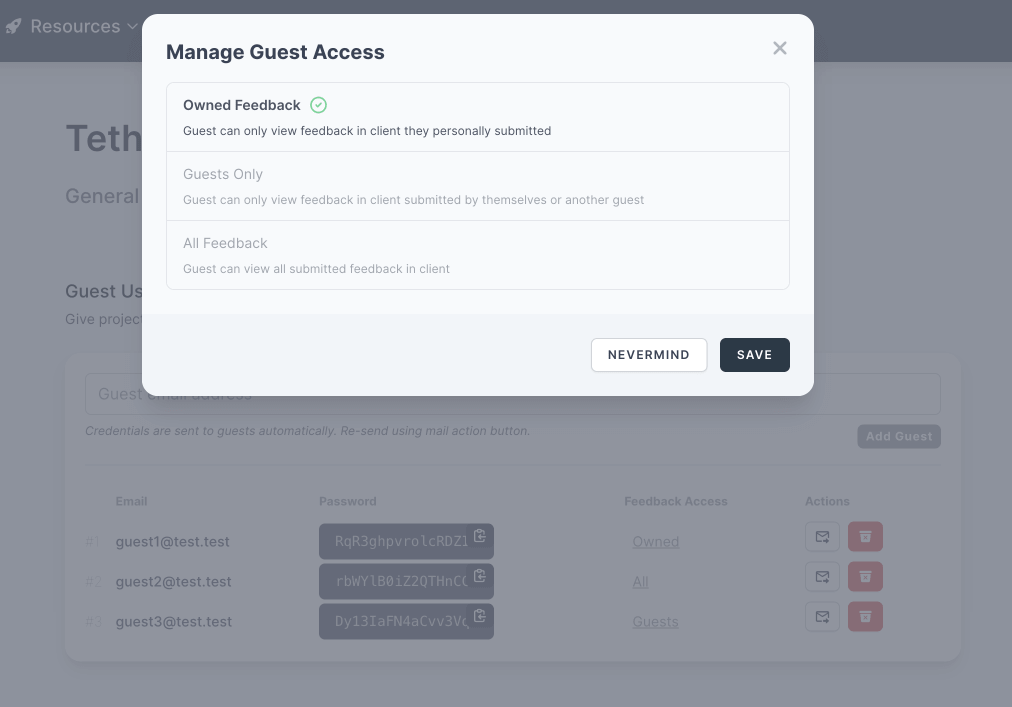
Feedback Access Level
As mentioned above, team administrators may choose to grant guests additional feedback access on a per-guest and per-project basis. Since guests can only log in to the Tether widget (and not the dashboard), feedback access level only changes what feedback the guest can see in their widget's "Activity" tab. Currently supported access levels are:
- Owned - Guest may only see feedback they personally submitted.
- Guest Only - Guest can see feedback submitted by themselves or any other guest associated with the project.
- All - Guest can see feedback submitted by themselves and the entire team.
Changing Feedback Access Level
-
Navigate to your project's settings, and select the "Guests" tab
-
Click the underlined text representing the guest's current access level in the "Feedback Access" column to open the overlay
{info.fa-info-circle} Only team owners and administrators are permitted to change guest access levels
-
Choose the desired access level, then click save (The change will take effect immediately, but may require the guest to reload their "Activity" tab)
How Many Guests Can I Add?
Guests are assigned on a per-project basis, and the number of guests allotted is a fraction of your team's seat count. Each project may add up to 50% of your seat count as guests, rounded down to the nearest integer greater than 1. For example, if you team pays for 6 seats, each of your projects may have 3 guests. If your team has 3 seats, each of your projects may add 1 guest.
Please feel free to contact us if you need a certain number of guests, or if you have any other questions about how guests are allotted.
Adding Guests
-
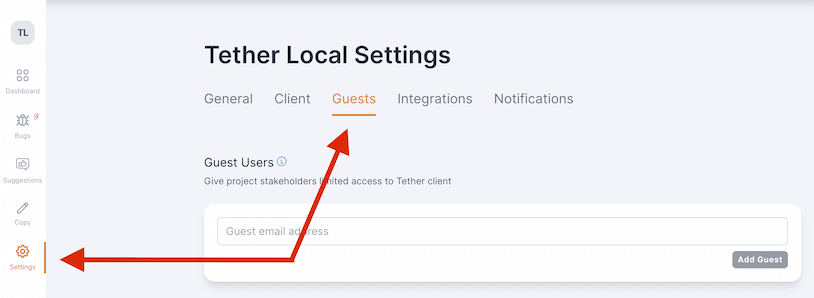
Guests are added on a per-project basis. After determining which project you want to add guests to, navigate to that project's settings page by clicking "Guests" from the project dropdown menu on the project hub
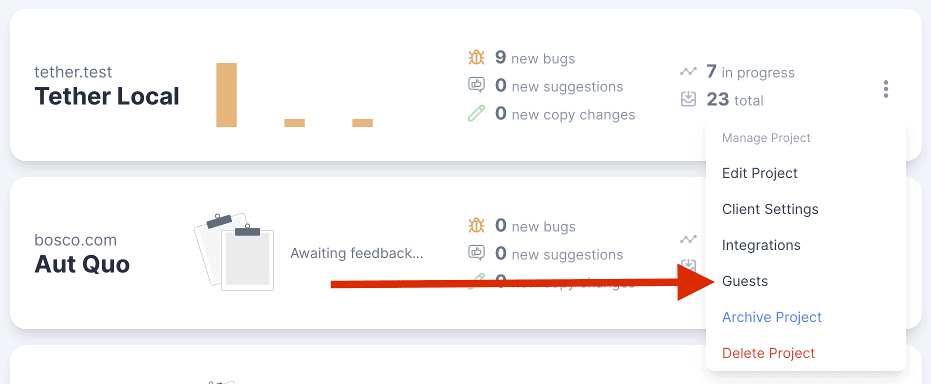
{info.fa-info-circle} You may also reach project settings by clicking the "Settings" panel if you're already on the project dashboard
-
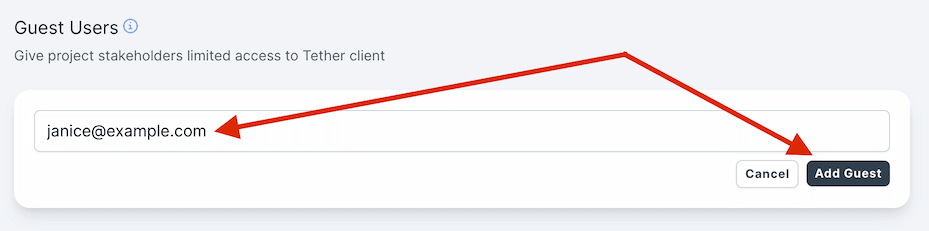
Enter the email address of your new guest, and click "Add Guest"
{warning.fa-lock} Administrator permission is required to add or remove guests from a project
-
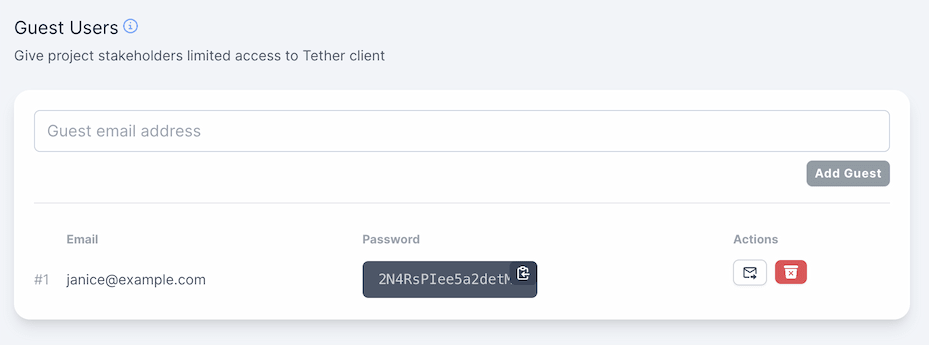
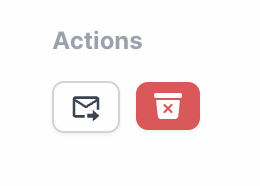
As you can see, a password was automatically generated for your guest. In order for them to login, we need to get this password to them somehow. Of course, you can always just copy the password and Slack it to the new guest - but we also provide the option to automatically email these credentials to the guest by clicking the white mail icon in the "Actions" column.
Logging In as a Guest
Logging in as a guest is straightforward. Simply use the auto-generated credentials to sign in to the Tether widget as you would a regular user. The only difference between guests and users is that guests are not able to log in to the Tether dashboard. Additionally, guests logged into the widget are only able to view and comment on feedback they personally submitted (i.e. guests cannot resolve, prioritize, or assign feedback to team members).