Creating a Project
Project Types
Tether offers a couple project types which address two common circumstances where feedback is essential:
- Internal Projects are intended to allow your team and other stakeholders to report bugs or offer suggestions, as well as to collaborate and communicate in order to resolve issues. You must be subscribed to a paid plan to create internal projects.
- External Projects allow you to receive feedback directly from your end-users. Unlike the internal widget, external Tether widgets do not have a login form. Instead, end-users enter their email directly into the feedback form. You can create up to 1 external project(s) on our Free tier plan.
How to Create a Project
Projects allow you to group your feedback by the domain from which they were received and associate your various web applications with 3rd-party integrations. Anytime you want Tether to be visible on a new domain, your first step is to create a new Project. If the origin attempting to load Tether does not match the domain defined for the associated Project, Tether will not load.
{info.fa-info-circle} A single Tether project can be used for any path under a single domain, but to install Tether on a different subdomain, you must create a new Project. For example, let's say we have a Project for the domain
tethered.dev. Tether can used ontethered.dev/page-1, ortethered.dev/user/profile/page-2, but will not work onapp.tethered.devWildcard subdomains are supported, but you must at least define the top-level domain e.g.*.tethered.devandmedia.*.tethered.devwould both be valid, butapp.*.devandgoogle.*would be invalid.
{info.fa-info-circle} Tether will disregard any
wwwprefix when validating request origins, therefore prefixing your domain withwwwis not necessary.
Video Walkthrough
Stepwise Walkthrough
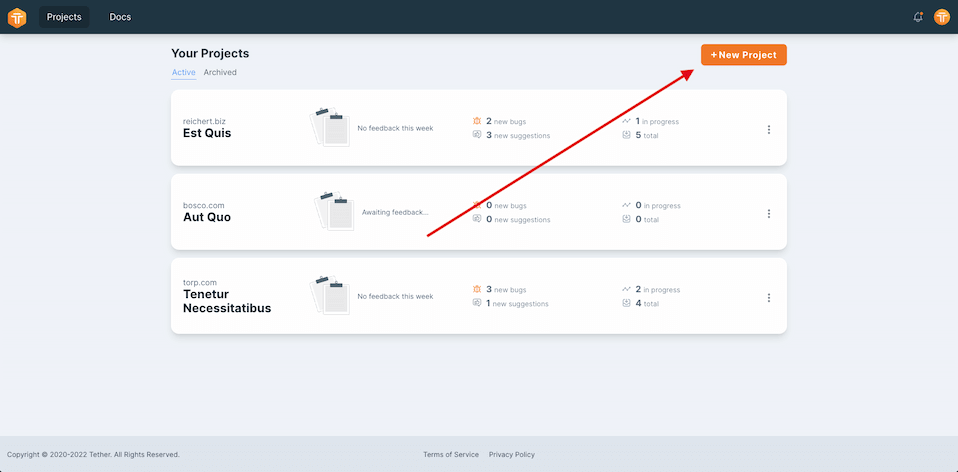
- Go to your Projects page
-
Click the "New Project" button
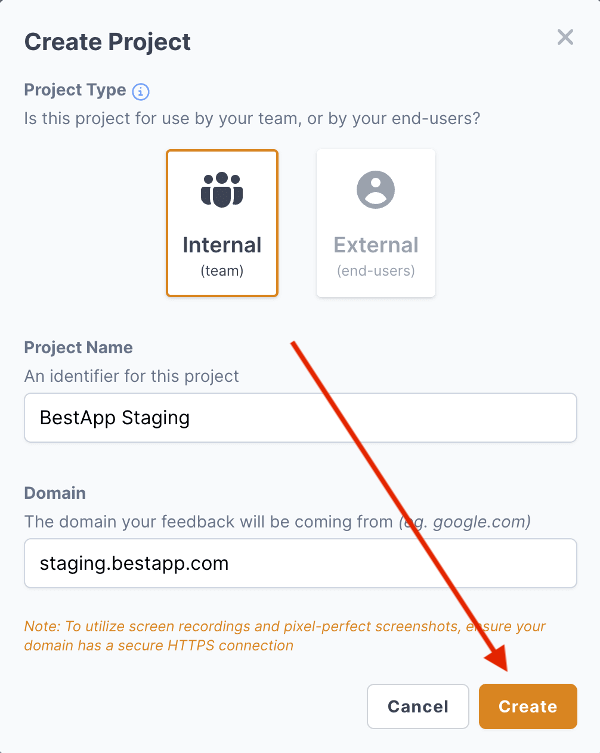
{warning} Do not include the protocol (e.g.
https://) orwwwin your domain. If the page you're installing Tether on lives on a subdomain, use that instead of your root domain (e.g. app.tethered.dev instead of tethered.dev).
-
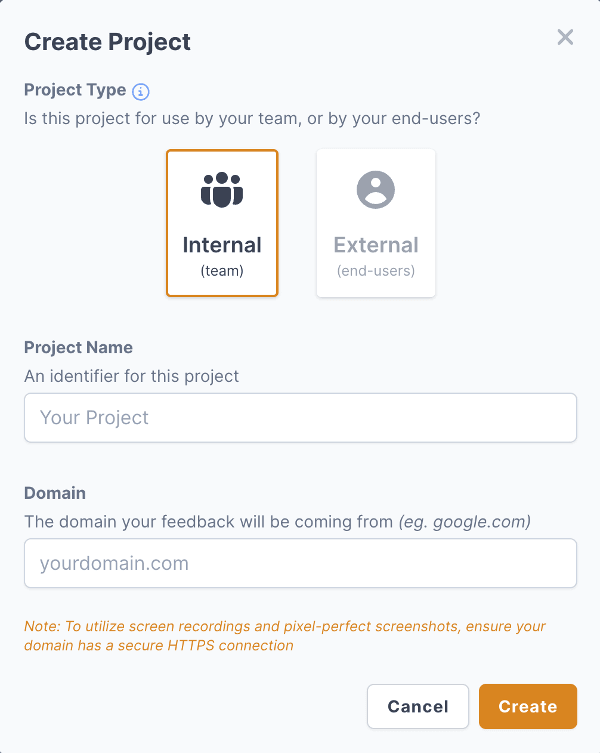
Select your project type. Use the "Internal" type if you're installing the widget on a dev or staging environment and want to collaborate with your team and stakeholders. On the other hand, use the "External" type for your production environment to hear directly from your users.
-
Enter a name and domain of your web application, then click the "Create" button
-
Customize the Tether widget for your new Project, or close the popup and change them later