Quick Start
- What is Tether?
- Signing up for an account
- Creating your first Project
- Installing Tether
- Submitting Feedback
What is Tether?
Tether is a tool for reporting and managing feedback for your web applications or websites. For many teams, writing bug reports or suggesting enhancements is an ad-hoc process using whatever apps the reporter has available.
Every extra step and tool required to report feedback makes it less likely that it will be submitted. Nobody wants to take screen recordings with Quicktime, annotate it in Figma, upload it to Notion, add technical details, and ping a developer in Slack. That means you're missing out on bugs and product suggestions from your team.
Tether solves this problem by replacing all those tools with a single button that lives on top of your web application. Capturing screenshots and recordings is now a click away, and Tether automatically grabs the necessary technical details for you. The Tether dashboard gives you a centralized location where you can manage, assign and resolve all feedback. Or you can send your feedback to wherever you manage your tasks via our integrations with services like Slack, Trello, Jira, Asana, Linear, and more (see Zapier). Teams using Tether report and resolve bugs efficiently, and get more quality product suggestions from their team. This leads to a better and more stable product, with happier users.
Signing up for an account
-
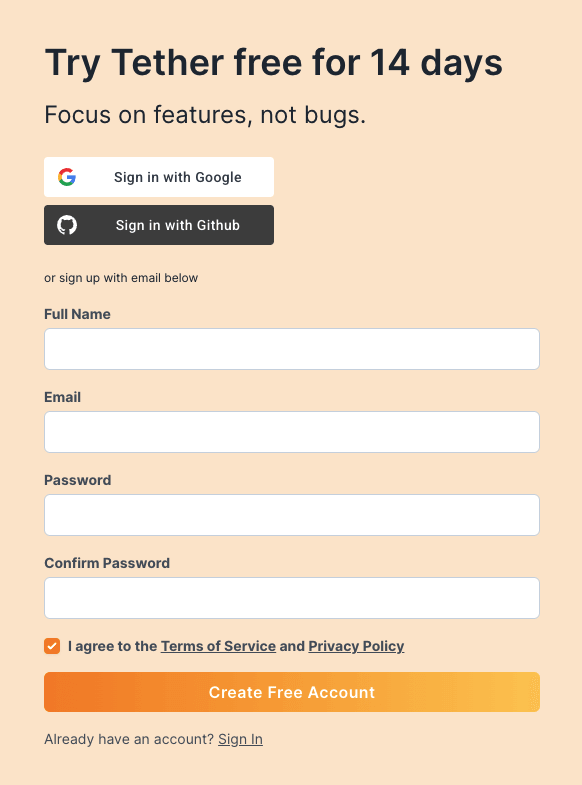
Navigate to the sign-up page
-
Enter your full name, email address, and password
-
Click the "Create Free Account" button
-
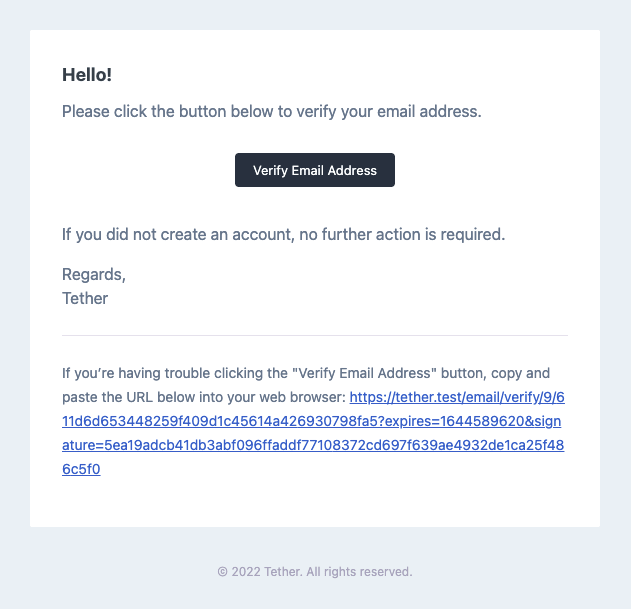
Check your email for a verification link
-
Click the link in the email to verify
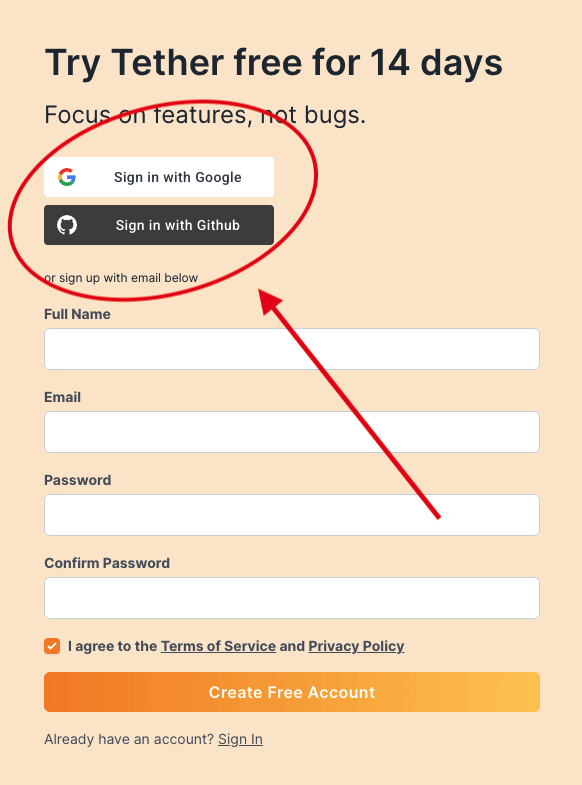
One-Click Registration
Sign-up can be expedited by using the one-click GitHub and Google login buttons. Since your email ownership has already been verified by your access to your Github or Google account.
Creating your first Project
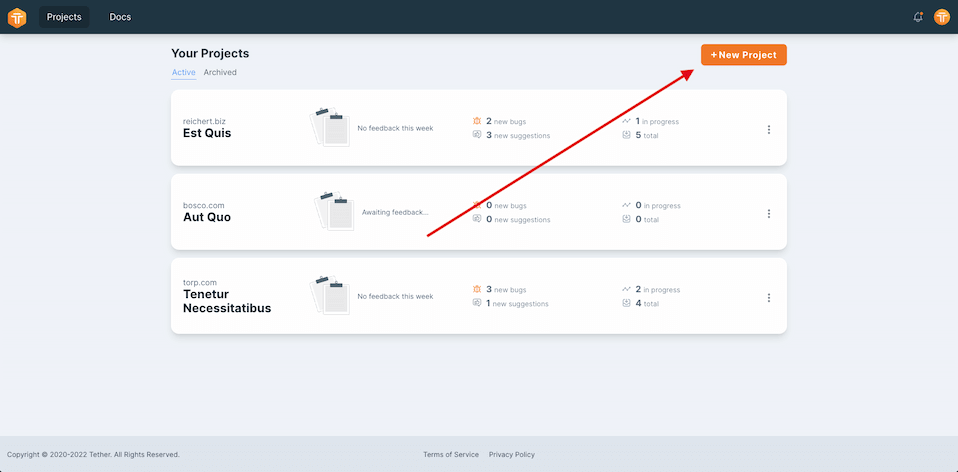
- Go to your Projects page
-
Click the "New Project" button
{warning} Do not include the protocol (e.g.
https://) orwwwin your domain. If the page you're installing Tether on lives on a subdomain, use that instead of your root domain (e.g. app.tethered.dev instead of tethered.dev).
-
Enter a name and domain of your web application, then click the "Create" button
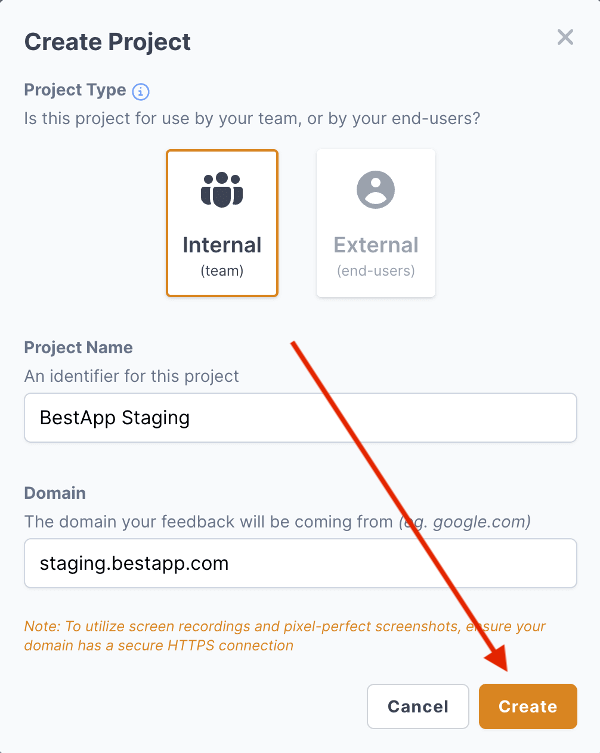
-
Customize the Tether widget for your new Project, or close the popup and change them later
Installing Tether
Tether installation is straightforward; you simply paste the provided installation script tag into your web application's HTML file. Once installation has succeeded, you will see the Tether widget appear overlaid on your web application.
{alert.fa-lock} Some functionality, such as pixel-perfect screenshots and screen recording, are only available on pages with a secure HTTPS connection (SSL/TLS)
Installation Example
<!DOCTYPE html>
<html>
<head>
    <title>Web App</title>
    <meta charset="utf-8">
    <meta name="viewport" content="width=device-width, initial-scale=1">
    <!-- Fonts -->
    <link rel="stylesheet" href="https://fonts.googleapis.com/css2?family=Inter:wght@400;600;700&display=swap">
    <!-- Styles -->
    <link rel="stylesheet" href="css/style.css">
    <!-- Tether -->
    <script
        defer
        type="text/javascript"
        src="app.tethered.dev/js/tether.js"
        data-id="tether-client"
        data-token="********************"
        data-project-uuid="********************"
    ></script>
</head>

<body>
    ...
</body>
</html>
Successful Installation:
Installing with Google Tag Manager
Tether also provides a code snippet that can be dropped into your Google Tag Manager configuration in order to quickly and easily install Tether on your web application. Check out this video walk-through for specific instructions on how to install via Google Tag Manager:
Which HTML file do I put the tag in?
Where you install Tether's script tag depends on the structure of your code, and which pages you want Tether to appear on. We'll cover specific scenarios in upcoming sections, but in general, you'll want to put Tether's script tag in the <head> of every page you want Tether to be available on.
My app uses a single HTML file
Simply paste the script tag into the <head> of your HTML file.
My app uses multiple HTML files
Paste the script tag into the <head> of all pages you want Tether to appear on.
My app uses a templating engine such as Blade or Pug
Paste the script tag into the <head> of your layout file, or into the <body> of any views you want Tether to appear on.
My app uses a framework such as React or Vue
React and Vue applications will always have a root HTML file used to mount your code. Paste the script tag into the <head> of this HTML file.
{info.fa-info-circle} Tether works best when installed in the
<head>section of your code because thedeferattribute will prevent HTML parsing from being blocked while Tether is loading. However, it can still be installed in the<body>of your code as well, such as when using conditional rendering.
Submitting Feedback
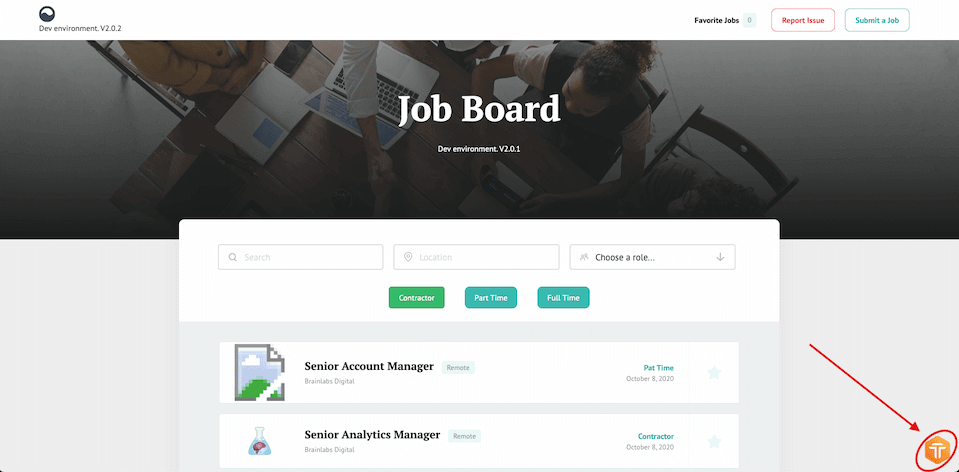
-
Start by clicking the floating hexagonal button in the corner of your screen to open the feedback form.
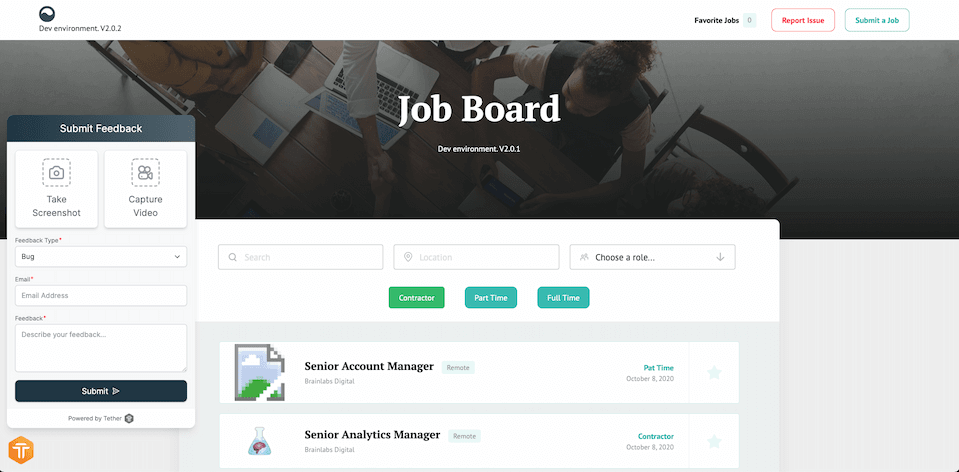
-
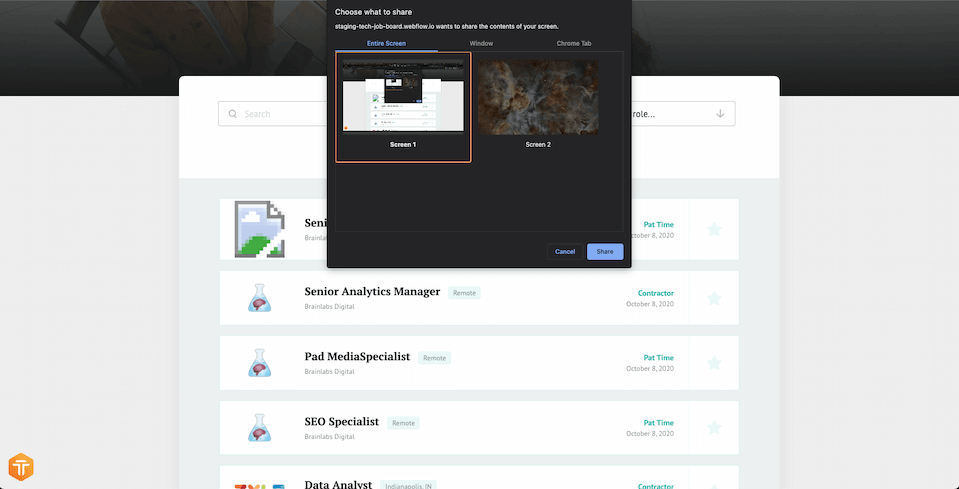
Click the "Take Screenshot" button to capture a screenshot of your current page.
-
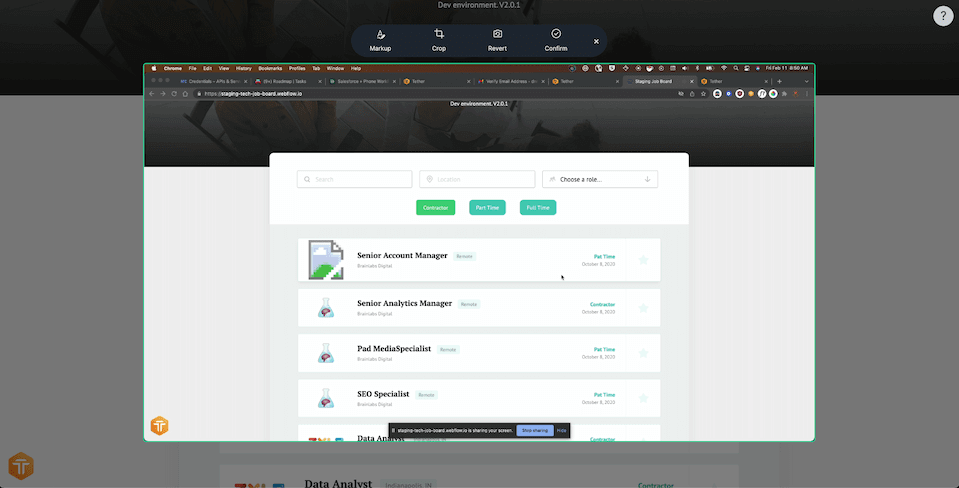
Your captured screenshot will appear along with various markup options. For the sake of simplicity, we'll leave it as-is. Click the "Confirm" button (checkmark) on the far right of the markup bar to accept the screenshot.
-
Fill out the remaining form fields by providing your email and a description of the issue you're experiencing.

-
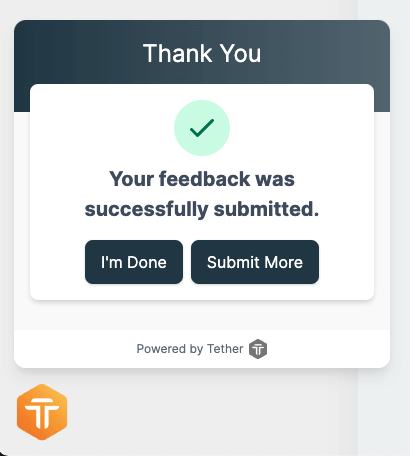
Once you're satisfied with your feedback, click the "Submit Feedback" button.
-
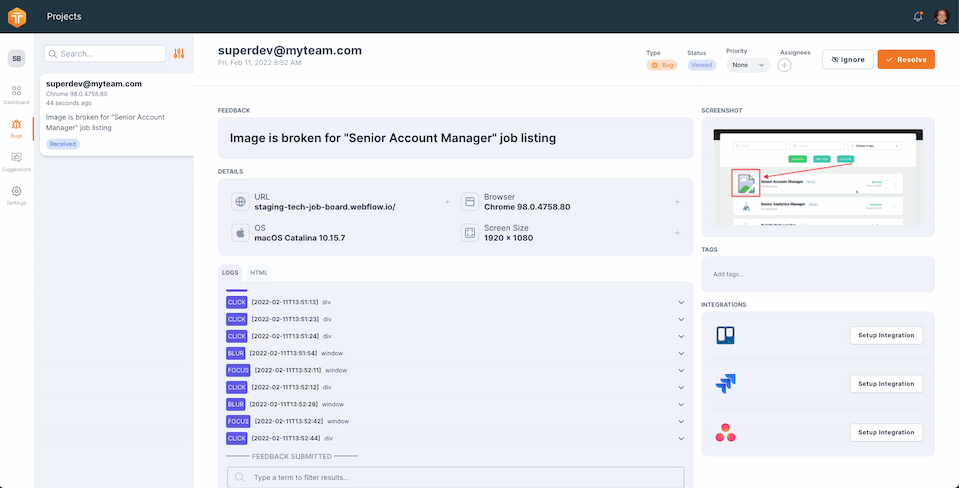
You're all set! Take a look at your first feedback by logging into your Tether dashboard, clicking the card for the Project associated with this domain, and selecting the new feedback from the "Recent Feedback" section. You can also view all bugs or suggestions by clicking the respective tab on the project dashboard's sidebar.